
The Three Bar Play Strategy

In this article10 sections
Some patterns come from crunching thousands of charts. Others come from a trader watching the tape for years and noticing the same three-candle sequence show up right before a trend resumes. The three bar play belongs to the second category, and its practitioner pedigree is exactly why it's worth understanding on its own terms rather than expecting it to behave like a statistically backtested pattern.
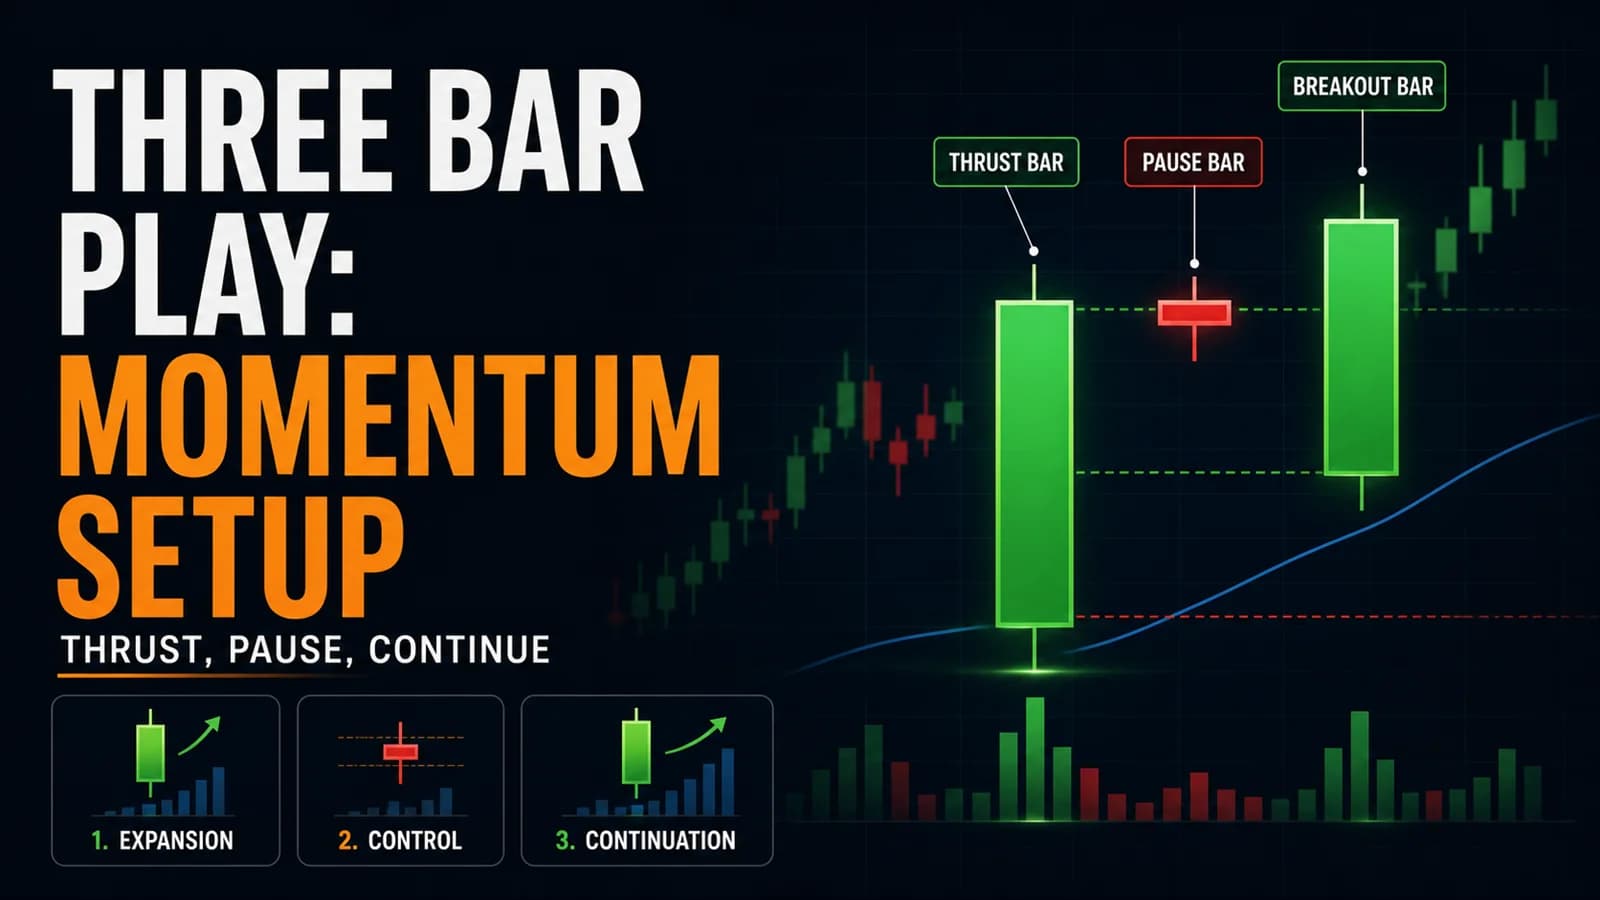
What is the Three Bar Play? The three bar play is a price-action continuation setup where a strong directional move is followed by two or three bars that pull back or pause within a tight range, and a break beyond that small range in the original direction signals the trend is resuming. It was popularized by traders Linda Bradford Raschke and Laurence Connors in their book Street Smarts: High-Probability Short-Term Trading Strategies, and it remains one of the more widely referenced setups from that era of price-action trading literature.
Where This Pattern Comes From, and Why That Matters
Worth saying plainly: the three bar play isn't a pattern with a large-sample statistical study behind it the way an inside day or an engulfing candle has. It comes out of discretionary, practitioner-level trading literature, specifically Raschke and Connors documenting setups they used in their own short-term trading during the 1990s. That doesn't make it invalid. It means the case for the three bar play rests on the logic of the setup and decades of trader use, not on a large database of measured win rates. This guide won't invent statistics that don't exist for this particular pattern. What follows is the mechanical structure as originally documented, adapted for a modern intraday chart.
How the Three Bar Play Differs From a General Inside Bar Coil
This site's Inside Bar Trading Strategy covers a related idea: multiple bars in a row, each contained within the one before, forming a tightening coil. The three bar play is a more specific, named version of that same family of pause-then-continue setups, with a few distinct rules of its own.
Where a generic inside bar coil can run for any number of bars and doesn't require a preceding "thrust," the three bar play specifically starts with a strong, wide-range directional bar (the thrust), followed by exactly two or three narrower bars that stay mostly within that thrust bar's range. The entry trigger is a break of the small range formed by those two or three bars, not necessarily the full range of the original thrust bar. Think of the three bar play as a tighter, more codified cousin of the broader inside-bar-coil idea, built specifically around a single strong impulse and a short pause immediately after it.
What Makes a Three Bar Play Worth Trading
The thrust bar needs to actually thrust. A wide-range bar on clearly above-average volume, ideally breaking a prior level or extending an existing move, sets up a real three bar play. A modest, unremarkable bar followed by two quiet bars is just noise wearing the pattern's shape.
The pause bars should tighten, not just sit still. The strongest version of this setup shows each of the two or three pause bars printing a narrower range than the one before, with volume tapering alongside. That tightening is the visual signature of sellers (in an uptrend) or buyers (in a downtrend) running out of conviction to fight the thrust.
Location still matters. A three bar play that forms after a breakout of a well-known level, or as a pause partway through an established trend leg, carries more weight than one forming in the middle of a directionless session. The pattern works best as a continuation tool, not a reversal call.
The pause should stay shallow. If the two or three pause bars retrace deep into the thrust bar's range, closer to erasing the thrust than pausing within it, the setup starts to look more like exhaustion than a flag. A shallow pause in the upper third (for a bullish thrust) or lower third (for a bearish thrust) of the thrust bar's range is the classic footprint.
Three Bar Play Setup Spec
- Component
- Market Conditions Required
- Specification
- A strong, wide-range thrust bar on above-average volume, followed by exactly two or three narrower bars pausing within or near the thrust bar's upper (bullish) or lower (bearish) range
- Component
- Time of Day
- Specification
- Most reliable after the opening 30-60 minutes, once a genuine directional thrust has had room to form; works on any intraday timeframe from 5-minute to hourly
- Component
- Stock Selection Criteria
- Specification
- Liquid names capable of producing a real directional thrust bar; illiquid tickers rarely print a clean enough impulse to qualify
- Component
- Entry Trigger
- Specification
- A stop order placed just beyond the high (long) or low (short) of the two or three pause bars, not the full thrust bar's range
- Component
- Stop Loss
- Specification
- Just beyond the opposite extreme of the pause bars, or beyond the thrust bar's own extreme for a wider, more conservative stop
- Component
- Initial Profit Target
- Specification
- A distance equal to the thrust bar's range, projected from the breakout point, as the baseline measured move
- Component
- Trade Management
- Specification
- Trail behind each new higher low (long) or lower high (short) once the trade clears the initial target, letting a genuine continuation run
- Component
- Invalidation Criteria
- Specification
- Price closes back through the thrust bar's origin, or a fourth and fifth pause bar form without any breakout, signaling the pause has stalled out rather than resolved
| Component | Specification |
|---|---|
| Market Conditions Required | A strong, wide-range thrust bar on above-average volume, followed by exactly two or three narrower bars pausing within or near the thrust bar's upper (bullish) or lower (bearish) range |
| Time of Day | Most reliable after the opening 30-60 minutes, once a genuine directional thrust has had room to form; works on any intraday timeframe from 5-minute to hourly |
| Stock Selection Criteria | Liquid names capable of producing a real directional thrust bar; illiquid tickers rarely print a clean enough impulse to qualify |
| Entry Trigger | A stop order placed just beyond the high (long) or low (short) of the two or three pause bars, not the full thrust bar's range |
| Stop Loss | Just beyond the opposite extreme of the pause bars, or beyond the thrust bar's own extreme for a wider, more conservative stop |
| Initial Profit Target | A distance equal to the thrust bar's range, projected from the breakout point, as the baseline measured move |
| Trade Management | Trail behind each new higher low (long) or lower high (short) once the trade clears the initial target, letting a genuine continuation run |
| Invalidation Criteria | Price closes back through the thrust bar's origin, or a fourth and fifth pause bar form without any breakout, signaling the pause has stalled out rather than resolved |
Trading the Setup: A Step-by-Step Walkthrough
Say ticker XYZ breaks out of a morning range on a wide, high-volume candle, clearing a level that's held since the open. That's the thrust bar. The next two 5-minute candles print inside the upper portion of that thrust bar's range, each one narrower than the last, with volume fading.
A trader watching for the three bar play marks the high of those two pause bars and places a buy-stop just above it, with a stop-loss just below the low of the same two bars. Neither order requires constant screen-watching once it's set.
When XYZ breaks above the pause bars' high on renewed volume, the long triggers. The stop-loss sits at the pre-defined level below the pause bars, and the initial target sits one thrust-bar range above the entry point. If XYZ had instead broken down through the pause bars' low, that would invalidate the bullish read entirely, since a break of the pause range in the wrong direction means the setup failed rather than simply reversing to a short.
Managing the Trade Once It Triggers
The three bar play, done well, tends to reward patience on the back half more than the front half. Because the setup requires a genuine impulse to already be underway, a successful breakout from the pause often has real follow-through behind it. Taking partial profit at the initial measured-move target while trailing the remainder behind each new short-term swing point lets the trade capture more of a strong continuation without giving back the full gain if momentum fades early.
Watch how price behaves in the first few bars after the breakout triggers. A clean push away from the pause bars' boundary, without an immediate stall, supports staying in the trade. A breakout that triggers and then immediately drifts back into the pause bars' range is a weak-conviction signal, and tightening the stop or exiting early is a reasonable response rather than waiting for the full stop-loss to be tested.
Where the Three Bar Play Fails
The most common failure is a pause that never resolves into a real breakout: a fourth, fifth, and sixth bar keep forming without ever clearing the pause range in either direction, and what looked like a tight two-bar pause turns into an extended, directionless chop. The Invalidation Criteria in the Setup Spec exists to catch exactly this: once the pause runs past three or four bars without resolving, the "play" has effectively expired.
A second failure shows up when the thrust bar itself wasn't a real thrust, just an average-sized bar that happened to be followed by two quiet ones. Because the entry trigger sits close to the pause bars rather than the full thrust bar's range, a mediocre thrust bar produces a mediocre reward-to-risk setup even when the mechanical trigger fires cleanly. The pattern's name describes the shape, not the quality, and shape alone isn't enough.
A third failure comes from treating this as a reversal signal. The three bar play is a continuation setup by design. Applying it at the end of an extended trend, hoping the pause marks a top or bottom rather than a pause within an ongoing move, stretches the pattern well outside how it was originally documented and tends to perform worse than using it as intended.

A Note on Variations
Some traders extend the concept to allow a single pause bar (sometimes called a "one bar pullback") or up to four pause bars, rather than holding strictly to two or three. The core logic doesn't change: a real thrust, a shallow pause that tightens, and a break of the pause range in the thrust's direction. What does change is how selective the setup becomes. Requiring exactly two or three bars, as originally documented, filters out a meaningful share of the weaker, more drawn-out consolidations that a looser bar count would let through.
Tools for Spotting Three Bar Plays
This pattern is fundamentally about reading the relationship between one strong bar and the handful that follow it, which makes real-time volume and range visibility more useful than any single indicator. A scanner capable of flagging unusual volume thrusts as they happen gives a trader the first half of the setup automatically, leaving the two or three pause bars to confirm manually. Trade Ideas offers this kind of real-time volume and momentum scanning, which can surface candidate thrust bars across a watchlist as they form rather than requiring a trader to catch them by eye.
Beyond scanning for the initial thrust, standard charting software with volume overlays is sufficient to manage the rest of the setup. No specialized indicator replicates the pattern; it comes down to reading bar-by-bar range and volume behavior directly.
Where the Three Bar Play Fits in a Trading Plan
This setup works best for traders who are already tracking momentum and breakout candidates and want a defined way to re-enter or add to a position after the initial move has paused, rather than chasing the thrust bar itself at a worse price. It pairs naturally with opening range and momentum strategies, where the thrust bar is often the same breakout a trader was already watching for.
Because the entry trigger sits close to the pause bars rather than far from the action, position sizing should account for a stop distance that's often tighter than a full mother-bar-based setup, which can support slightly larger position sizes for the same fixed dollar risk. As with any price-action setup drawn from discretionary trading literature rather than large-sample statistics, treating this as one tool among several, rather than a strategy to trade in isolation, is the more realistic way to use it.
What is a three bar play in trading?
The pattern was documented by traders Linda Bradford Raschke and Laurence Connors in Street Smarts, and it's built around reading a genuine pause after a real impulse rather than guessing at reversals.
Key Takeaway: The pattern requires a real thrust bar first; without one, the setup is just two or three quiet bars with no edge behind them.
Where did the three bar play come from?
Because of that origin, the case for this pattern rests on trading logic and decades of practitioner use rather than a measured win rate across a large sample of trades, unlike some other chart patterns with more extensive backtested research behind them.
Key Takeaway: Approach this setup as a logical framework refined by experienced traders, not as a pattern with a documented statistical edge.
How is the three bar play different from a general inside bar coil?
Both belong to the same family of pause-then-continue setups, but the three bar play is a more tightly defined version with its own historical rules, and its entry trigger uses the pause bars' own range rather than the full range of the bar that preceded them.
Key Takeaway: Treat the three bar play as a specific, named variant within the broader category of contraction-based continuation patterns.
What makes a good thrust bar for this setup?
A thrust bar that's only slightly larger than recent average bars doesn't carry the same conviction, and the pause bars that follow it are more likely to represent genuine indecision rather than a real, tradeable pause after momentum.
Key Takeaway: Judge the thrust bar's quality before assuming the pattern that follows it is worth trading.
How many pause bars should you wait for?
Some traders extend the concept to accept a single pause bar or up to four, but the tighter two-or-three-bar version tends to filter out more of the weaker, drawn-out consolidations that a looser bar count would let through.
Key Takeaway: Stick close to the original two-or-three-bar structure for the cleanest version of this setup.
Where do you place the stop-loss on a three bar play?
Using the pause bars for the stop keeps risk tight and tied to the immediate structure of the setup. Using the full thrust bar for the stop gives more room but increases the dollar risk per share, which should be reflected in a correspondingly smaller position size.
Key Takeaway: Choose your stop reference deliberately, and size the position to match whichever distance you pick.
Can the three bar play be used as a reversal signal?
Applying it near the end of an extended trend, hoping the pause marks a top or bottom, stretches the pattern outside its intended use and tends to underperform compared to using it as the continuation tool it was designed to be.
Key Takeaway: Reserve this setup for continuation situations and look to other patterns for reversal signals.
What's the most common way a three bar play fails?
The mechanical Invalidation Criteria exists specifically to catch this: once the pause extends well past three or four bars without triggering, the original setup has effectively expired and shouldn't be forced.
Key Takeaway: Give the pattern a defined shelf life, and walk away from stale setups rather than waiting indefinitely for a breakout.
Does the three bar play work on any timeframe?
Shorter timeframes produce more candidate setups per session but a higher share of low-quality ones, while longer timeframes produce fewer, generally higher-conviction setups that take longer to resolve.
Key Takeaway: Match the timeframe to your available screen time and the average number of quality thrust bars a given ticker tends to produce in a session.
Disclaimer
Article Sources
- StockCharts ChartSchool: Chart Patterns - overview of continuation pattern structure and breakout confirmation
- StockCharts ChartSchool: Introduction to Candlesticks - foundational reference on bar-by-bar price action
- CME Group: Technical Analysis - educational material on momentum, thrust, and continuation concepts
- FINRA: Day Trading Margin Requirements - current intraday margin and risk rules relevant to active trading
Was this helpful?
Be the first to weigh in

Written by
Kazi Mezanur RahmanFounder, independent researcher, and editor of DayTradingToolkit. A one-person publication focused on risk-first trading education and documented tool research. He trades his own capital as a retail trader and combines personal market experience with systematic primary-source research.
Keep Reading
Strategies
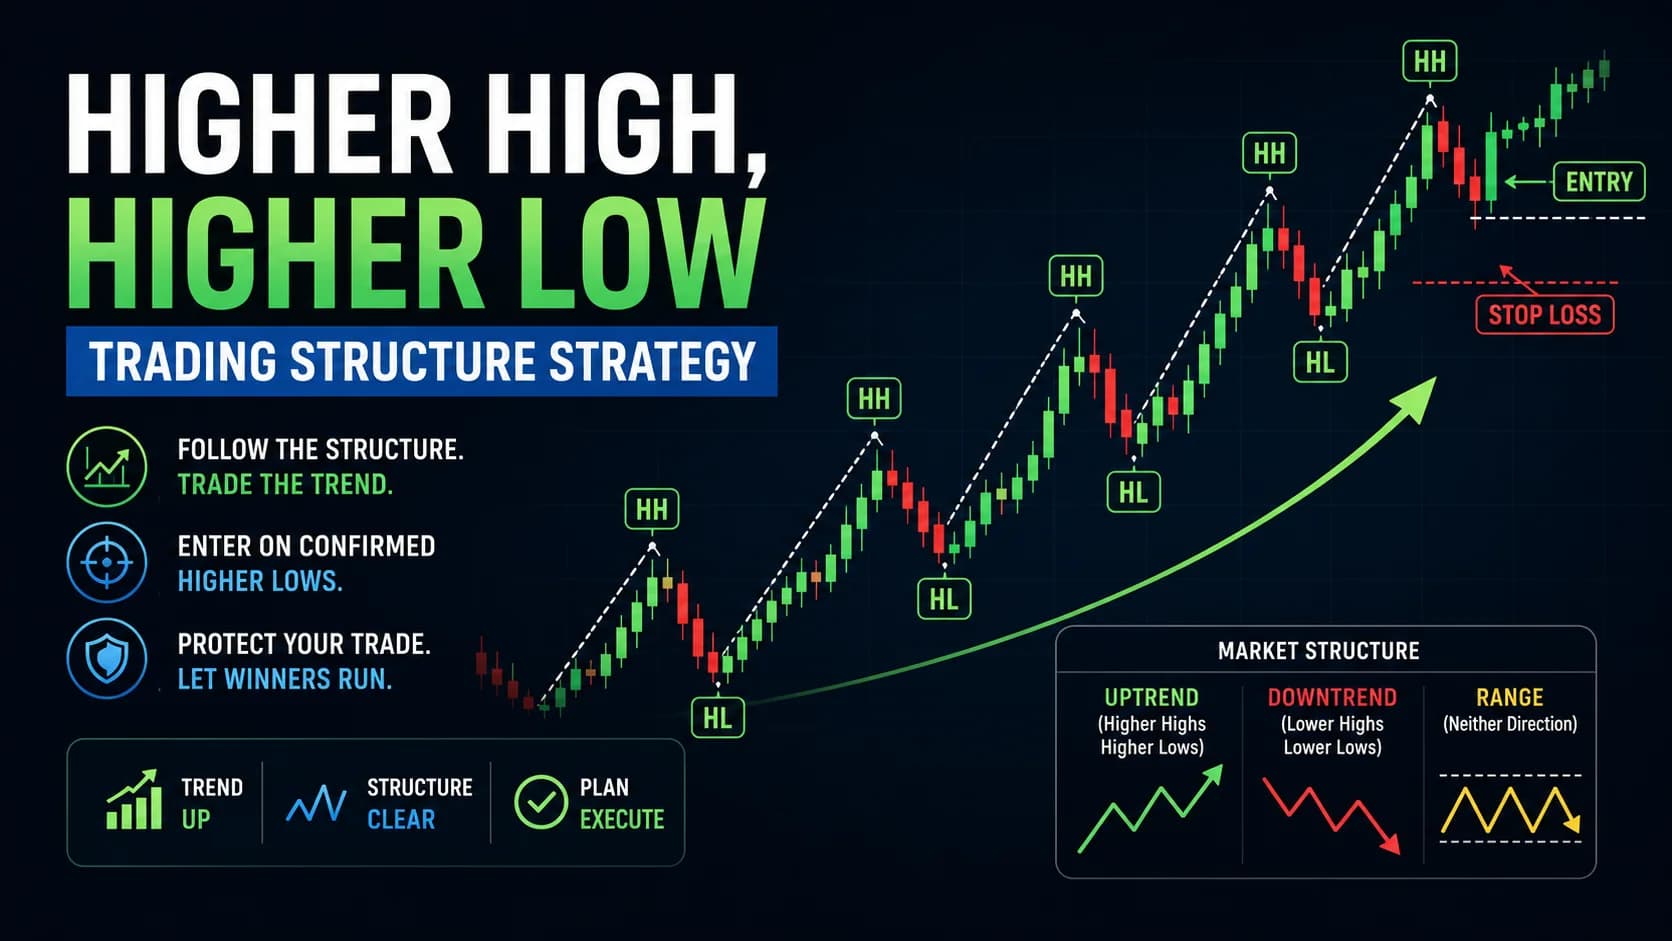
The Higher High, Higher Low Trading Strategy (Market Structure Basics)
A mechanical market structure trading strategy built on Dow Theory's higher-high, higher-low framework: how to confirm swing points, enter continuations, and spot a real break of structure.

Strategies
Day Trading Strategies: Finding the Right Approach for Your Trading Style
Discover the 6 core day trading strategies, learn which fits your personality and schedule, and avoid the #1 mistake that kills most trading accounts.
Strategies
Setup vs. Strategy vs. System: The Three Words Every Trader Confuses
Learn the critical difference between a trading setup, strategy, and system. Most traders conflate all three — and it's costing them money

Strategies
One Strategy or Many? The Specialization vs. Diversification Debate
Should you master one trading strategy or trade multiple setups? We break down the real debate, a phased model, and a self-assessment framework to decide.
Comments
No comments yet. Be the first to share your thoughts.